
Make a LED lamp is not very complicated. We can use some simple material to DIY a LED hanging lamp.
Here is a step-by step DIY course to create a hanging lamp.

Step 1: Design Your Lamp Shape
- Inspiration: Refer to creative acrylic lamp designs like the Bent Acrylic Lamp or modern modular panels
. Sketch your desired shape (e.g., geometric, circular, or freeform) on paper.
- Tools Needed: Pencil, ruler, marker, acrylic cutting tool or a sharp utility knife.
Here's a step-by-step DIY course to create a hanging lamp using an LED bulb and acrylic transparent panel:

Step 2: Prepare Materials
- Essentials:
- LED bulb (choose a bulb with a wide base for better heat dissipation.
- Acrylic transparent panel (thickness 3-5mm recommended for durability.
- Werkzeuge: Craft knife, cutting mat, ruler, clamps, screwdriver, AB glue, hanging hooks.
- Optional: LED driver (if your bulb requires one), heat shrink tubing (for wire protection).
Step 3: Cut and Bend the Acrylic Panel
- Cut the Panel:
- Transfer your design onto the acrylic panel.
- Use a craft knife and ruler to score and snap the acrylic along the lines (or use a CNC cutter for precision).
- For curves, gently heat the acrylic with a hairdryer or heat gun, then bend it over a curved mold (e.g., a bowl).
- Smooth Edges:
- Sand the cut edges with fine-grit sandpaper to remove sharp burrs.

Step 4: Install the LED Bulb
- Prepare the LED Circuit:
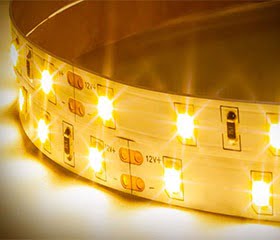
- If using a string of LED-Streifenlichter, connect them to a power source (12V DC is safer for acrylic).
- For a single bulb, ensure the socket matches the LED base.
- Attach the LED:
- Glue the LED(s) onto the acrylic panel using AB glue, positioning them evenly for balanced lighting.
- Allow the glue to dry completely (24 hours).
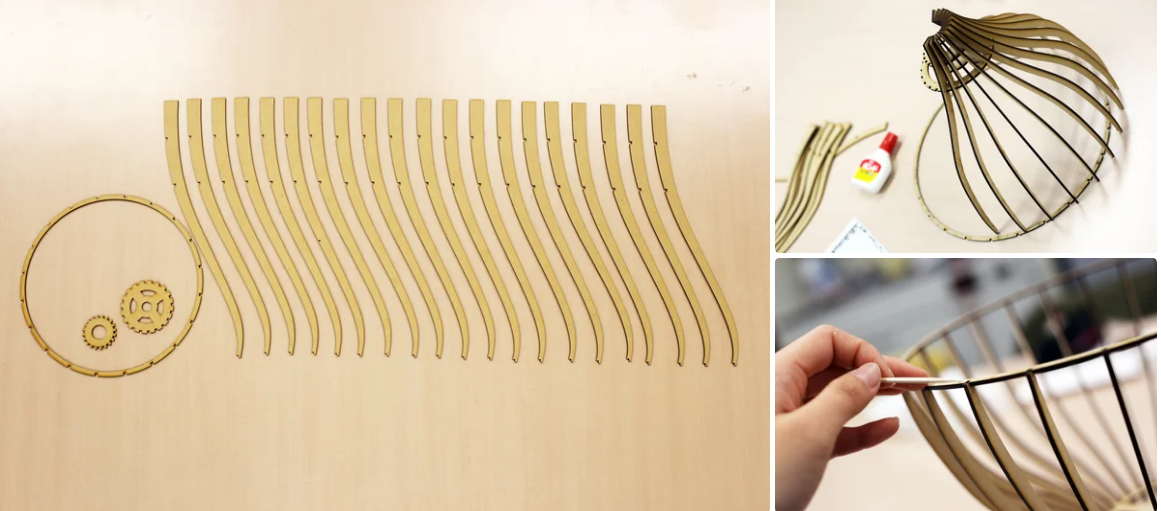
Step 5: Assemble the Lamp Structure
- Frame Construction:
- Cut wooden or metal strips to create a frame that matches your acrylic shape.
- Screw or glue the frame to the back of the acrylic panel.
- Hanging Mechanism:
- Attach hooks or eyelets to the top of the frame.
- Use wire or sturdy string to hang the lamp from the ceiling.
Step 6: Test and Adjust
- Turn on the LED(s) to check for even lighting and proper connectivity.
- Adjust the angle of the acrylic panel or reposition the LED(s) for optimal lighting.
Safety Tips
- Wear gloves while cutting acrylic to prevent cuts.
- Work in a well-ventilated area when using adhesives or heat tools.
- Ensure the LED power source matches the bulb requirements to avoid overheating.
Optional Upgrades
- Add a dimmer switch for adjustable lighting.
- Use RGB LED bulbs to create color-changing effects.
- Incorporate a sensor (e.g., motion or light sensor) for smart functionality.
This project combines creativity with practical skills, turning simple materials into a unique hanging lamp!
 China")
")
hina")
")
 (4)")
hina")
FAQ
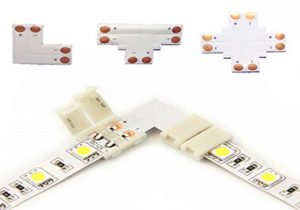
F: Kann ich abgeschnittene Streifen ohne Löten wieder verbinden?
A: Ja! Verwenden Sie lötfreie 4-Pin-Anschlüsse (ideal für RGB), achten Sie jedoch darauf, dass die Kupferpads sauber sind.
F: Warum bleiben manche LEDs nach dem Schneiden dunkel?
A: Wahrscheinlich aufgrund eines Spannungsabfalls. Installieren Sie ein 24V-Streifen oder Stromeinspeisepunkte hinzufügen.
F: Wie kann man abgeschnittene Enden wasserdicht machen?
A: Mit Silikongelverbindern oder Epoxidharz abdichten.


Über den Autor
JerryHu
Gründer von Lightstec.Ingenieurabschluss.Mehr als 13 Jahre Berufserfahrung im LED-Beleuchtungsgeschäft.Vertraut mit der Herstellung von LED-Beleuchtungsprodukten.Dieser Blog teilt Ihr Wissen und Ihre Lösungen in der LED-Beleuchtung.
Erfahren Sie mehr Professionelle geführte Kurse, die Ihnen weniger Leute sagen, bevor Sie einen Fehler machen.


Nice post. I learn something totally new and challenging on websites